ARE LISTED BELOW BY TOPIC, IN ALPHABETICAL ORDER. SCROLL DOWN TO THE FIRST LETTER OF THE PRODUCT, QUESTION OR TOPIC YOU’RE INTERESTED IN TO FIND THE ANSWERS. Or, If You’re Ready to Ask a Question, Use the Contact Form at the Bottom of This Page:
A
AIR COMPRESSORS
Hi Johnny,
My Answers and Opinions are Below, in Blue.
1. Should I get an oil-less compressor or an oiled compressor with all the water/oil separator equipment?
I’m not a big fan of oil-less compressors. They typically do NOT have a large enough tank and they are obnoxiously loud.
Are you basing your compressor decision on price point alone? If you’re plasma-cutting, what compressor are you using for that?
At some point, if you’re serious about making a side-income or full-time income, you’re going to own a real compressor. I’ve had at least 7 compressors, 6 of which were in the first 2 years of my plasma-cutting business. Then, I did what I should have done in the first place. I got a “real” air-compressor. I don’t recall the CFM at 150 psi, but I think it’s 23 CFM.
I’ve had 2, as the Ingersoll Rand I purchased in 2008, failed after 1 year & the cost to rebuild was prohibitive. I sold it “as-is” for about 1/2 of what I paid.
The only type of air-compressor that makes sense in our line of work (or hobby), is an 80-Gallon Upright Tank, 7.5 h.p 220V Motor, and Quincy or another leading brand would be good. I’d stay as far away from Horror Fright as possible. Everything they sell is Total Crap.
2. Seems to me I don’t need the huge 20 CFM compressor you recommend in your eBookt. If I can get 1 minute of high pressure air that is enough to blow-dry the items I am making one at a time.
1-Minute is NOT enough!
That might be fine for now, but you’ll be replacing it before you know it. A compressor should have a 100% Duty Cycle…anything less and you’ll soon tire of it’s limitations.
3. I am currently looking at oiled and oilless 20-25 gallon compressors rated at 150 psi.
They will blow at 6-7 CFM at 90 psi.
Oil-less Compressors are way too loud & the Duty Cycle is going to be far less than optimum. So, when you need it most, it will let you down & you will have to wait til it recharges. Don’t ever use a hair-dryer (blow-dryer), as heated air encourages flash-rust.
I make the assumption that if you’ve invested in a CNC machine, you’re serious about metal art, creating nice pieces and making a profit. You need the right tools & equipment. No one every made a success of their plasma-cutting business (or ANY business) by cutting corners. It just doesn’t work that way.
Mechanics don’t own 20k-40k worth of Snap-On® or Matco® tools for their ego or as a status symbol. They make their living with tools & they want and depend on the best tool for the job. Air compressors are no different.
If you & I were independently wealthy, we would own Screw Compressors. They are way more efficient than Piston Compressors & have a very low dB level. But, they start at 5k & go up from there.
And yes, you’ll need a good Regulator, Oil-Water Separator and in some cases, a Refrigerated Dryer. Between my Air Compressor, (which is equipped with an automatic-drain valve), I have 3 Separate Filters, Self-Draining Regulators and one of my filters is a Guard-Air® Sub-Micron Filter that costs less than $100.00. No oil or water can pass through it…just clean, dry compressed air.
Thanks,
Bill
January 4, 2018
B
BRONZE F/X™
BRONZE F/X™ STEEL PATINA
Q:
Bill,
Nice job on what you are doing.
I’ve got a question on top coat. I’ve been testing the BRONZE F/X over prepared mild steel. I love the color after the reaction, beautiful metal tones. However, after top coating with enamel in a rattle can the metal tone mostly go away, still looks bad ass, but is missing the depth.
Is this because of using a low end top coat? If I used an automotive clear coat would this still happen? Are there other ways to protect the finish?
Best regards, Rich Vedaa
A:
Hi Rich,
The most likely reason for the problem you’re describing is the prep just prior to shooting your clear. The BRONZE F/X™ liquid patina, after rinsing, will leave a little haze or ‘patina smut’. BLACK F/X™ and some of the other patinas will also leave a little haze after rinsing and drying. That haze needs to be wiped off with a lint-free, clean tack rag. I have the best there is on the site. ‘Surgical Blue Tack Rags’
Then, you’re good to go with whatever clear-coat you want.
You WILL get a better film thickness, better UV protection and a ‘dipped in glass’ look with a 2-part (automotive) clear, but graduating to that step is up to you. That will be the “depth” you’re looking for. Rattle-Can Clears just won’t give you that depth as they’re mostly solvent with very little solids.
The clear you’re using won’t fade or erase any of the color of the bronze patina, but what’s happening is the clear is ‘wetting’ the smut and producing a less than desirable color. It’s also setting you up for de-lamination (peeling), in the future, so be sure and wipe ALL patinated steel before clear-coating.
Bill 👍
C
COLOR CASE-HARDENING PATINAS
Q: You have quite a few Gel Patinas for Case-Hardening Effects. Which ones do I need to get started? Paul R. 1/11/17
STEEL F/X® Gel Patinas are About the Same Viscosity as Room-Temp Honey. The Gel Patinas Allow Exact Placement of Color/s, and by Placing a Very Small Amount (1/4 tsp. or so) on the Steel, Then Moving it Around a Little With Canned-Air, Airbrush (Air Only, No Fluid), or a Small Artist’s Brush, Piece of Foam/Sponge (I Like the Natural Sea-Sponge), You Can Create Beautiful Marbling, Mottling & Patina Effects, Swirls, Color Case-Hardened Appearance, Random Patterns and More! Then, as With All the Patinas, Rinse (Neutralize) With Water, Dry With Clean, Oil-Free Compressed Air and Either Add More Patinas or Dyes if You Need to Intensify Your Work. Rinse Again, Dry Thoroughly & Your Piece is Ready for Clear-Coating or Sealing. 16 Oz. is Enough To Do Dozens of Pieces With Extremely Unique Marbling and/or Patterning. Can be Used on Bare Steel or Over the Other Patinas For Amazing Special Effects & Customer Dazzling Results.
Bill, I would really like to see a side-by-side comparison of BLUE HALO™ Gel, TORCH F/X™Gel and FLAME F/X™ Gel used over COPPER F/X™ Gel base coat, so I can determine what to purchase for upcoming home gun refinishing projects. Trying for a great case-hardening appearance but especially want some pretty blues and yellows. Thanks, Robert P.
A:
Hi Robert,
Will you be using the Gel Patinas on Carbon Steel or Stainless Steel?
Here’s the deal, though…What I turn out using the Gels you mentioned may be a little different than what you turn out, not because I’m a Master at it, but because of alloy differences, and individual application techniques, (sometimes referred to as, “Artistic License”), and especially the ‘dwell-time’ you encounter. “DWELL TIME” is the Amount of Time That the Gels are in Contact With the Substrate.
Simply put, if I place 1/4 tsp. of FLAME F/X™ Gel over COPPER F/X™ Gel, and move it around in a small area for 10-12 Seconds, you will get similar, yet possibly differing results depending on the amount of time you have the gel in contact w/ the steel, the amount of movement you give the gel, the temperature where you’re working and the relative humidity.
Granted, you will be able to see the differences between the 3 Gels you mentioned on a video, but your results may be better! Or, your results may fall a little short of what the video shows and what you expect.
You Need to Know That the Only Gel You Mentioned That REQUIRES COPPER F/X™ GEL as a Base is, TORCH F/X™ GEL. The Other Two Gels You Mentioned Will Work Over the COPPER F/X™ GEL, or Directly on Bare, Clean, Oil-Free Steel.
And, Since You Mentioned, “Pretty Blues & Yellows”, I’d Recommend You Use STAINLESS F/X™, as it Will Give More Color Variation, Including Vivid Blues, as Well as Some Yellows and Golds, as Will BLUE HALO™ Gel Patina, but the STAINLESS F/X™ is a Little More User-Friendly for a ‘First-Go’ at Color Case-Hardening by Chemical Reaction.
NOTE: STAINLESS F/X™ WORKS EQUALLY WELL ON MILD STEEL, STAINLESS STEEL, COPPER, BRASS AND BRONZE.
My best advice is to practice with 1, 2 or all 3 Gel Patinas on some scrap, mild (low-carbon) steel that has been polished up pretty well. The best way to get mild steel polished & ready for patina application is with a 4-1/2″ Angle Grinder & a 120-Grit (new) Flap-Disc.
No Other DIY Form of Sanding or Abrasive Work Will Give You the Shine of a Flap-Disc.
Die-Grinders Equipped With a 2″ or 3″ Diameter, 3M ROLOC® Backing Pad & Several Sanding Grits on Hand, From 220-Grit, All the Way Down to 1500-Grit, is a Great System to Have & is Very Affordable. I Prefer the Angled (30° or 45°) Type of Die-Grinder, as Opposed to the Straight, Inline Type. DREMEL® or FOREDOM® Tools Are Great to Have, Too.
Thanks,
Bill
CARS/TRUCKS – USING PATINAS ON VEHICLES
Hi John,
I Put my Answers in Bold/Blue.
Bill, I just ordered some COPPER F/X™, I’m going to spray it on an old ford F-100 truck. the truck is primed/painted, I want to put in ‘Copper’ brush marks on the leading edges of hood,fender,doors ,which will be made with a heavy grit sandpaper to get ‘bare metal’ scratches through the paint, which I would like to apply the copper F/X to…will the COPPER F/X damage/stain/mar the paint?
No, it won’t hurt cured paint or primer at all. It can dull the finish of some hardwoods, (I slightly screwed up a walnut fore-end on a lever-action rifle just this morning. Just took the shine off in a nickel-sized area & it can be fixed easily. But it won’t hurt paint, as long as the paint or primer is fully-cured.
(2) Can it be Applied to Sanded Chrome?
COPPER F/X™ will have NO Effect on Chrome, whether it’s roughed up or shiny. Steel or Iron Only. Now, if you sand or grind all the way THROUGH the Chrome Plating, to the Steel Center, the patinas, including COPPER F/X™ will work.
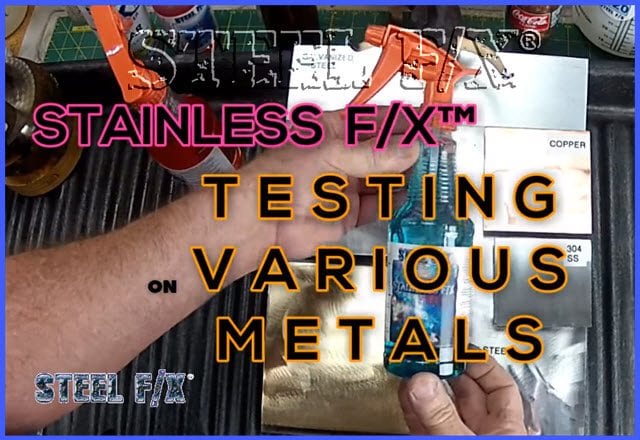
I have a new product that works on Stainless Steel, and equally well on carbon steel, but its a multi-color, rainbow type patina called, STAINLESS F/X™. And even it won’t work on Chrome or Aluminum.
It WILL work on all other metals that have been tested, including Copper, Brass & Bronze. The link above will show some photos.
(3) How long before I must clear-coat…I may need 2 or 3 days, but the truck will be in a garage, out of the sun. Is that too long?
That’s sort of a ‘trick question’. It all depends on humidity. If your relative humidity is 40% & climbing, you don’t have very long before ‘flash-rust’ starts to appear, or the patina loses a little of it’s brilliance, or both. If the humidity is 0%-39%, you should be fine for up to a week or so. A few sheets of VCI paper will guarantee you’ll be fine. Click here to read about VCI paper on my website. Where I’m at, in the desert southwest, I’ve patinated projects & not cleared them for 2-3 mos, with no problems at all. But, we seldom get humid days here.
You could also set up a portable dehumidifier to delay any rusting.
I found your product recently on ‘Road Hauks’ Camaro and was very impressed. I’ll bet that TV show alone has increased your business a lot!! I missed the show, even though Kenny told me about it 2-3 months ago. I’m gonna try & find it online & watch it. We’ve had a lot of calls & emails just today, re: COPPER F/X™, from folks that saw the episode.
Their car looked excellent, and if my results are remotely as nice as theirs, I will be ordering more and telling people up here in NH all about it!
Thanks ! I’m looking forward to trying this unique effect on my old truck. I’ll send you some pictures when completed, if you like.
I can’t wait to see some photos of your finished project! Thanks!
Thanks, Bill
Sincerely, John S.
p.s. Let me know if you have any further questions. I just watched 1/2 of the Road-Hauk Episode & have one suggestion: Whenever you’re misting COPPER F/X™ on an area that’s >5 Sq. Ft., DEFINITELY use the Pump Pressure Sprayer! It’s worth it’s weight in Gold!
Bill
COPPER F/X™
Q: I’m having some issues. I’m new to using the products and just not sure what I’m doing wrong. I’m experimenting with the COPPER F/X spray on 16 gauge mild steel. I get Black streaks in the copper patina and can watch it turn black. Can you give me any insights as to what I need to change? I’m rinsing as instructed and have also tried using OFF/X during the process. Thank you, Jaron H.
A: The COPPER F/X™is in contact with the steel surface a little too long. Try to limit the time to 10-12 Seconds whenever possible.
And, for any project…horizontal is better than vertical. Try very hard not to be tempted to ‘go over & over’ the same areas.
And, this is really helpful: For any piece larger than 5 sq. ft., use the Pump Pressure Sprayer for your COPPER F/X™. The patinas won’t hurt the sprayer. Set it to the finest possible mist, give the piece a quick, light, full-coverage mist & neutralize with water immediately.
In the heat of the summer, the dwell time is even more critical, so if you can apply your COPPER F/X™ in the shade or inside the shop, that would minimize the risk of the etchant precipitating & leaving black specks, streaks & spots.
If I reduce the etchant content, the copper plating would wipe off pretty easily, so just know that summer-time means you have to work a little faster between copper application & water neutralization.
I’ve gotten into the habit of having my water/spray nozzle in one hand & my COPPER F/X™ in the other hand.
One last thing. It doesn’t take a LOT of water to neutralize, so quite often, I use the 50 oz. Pressure Pump Sprayer, filled with distilled water (to eliminate water spots), instead of a garden hose & spray nozzle.
If your steel is 5, 6, 7 sq. ft. or larger, don’t use the pressure sprayer for the water rinse, as it’s not fast enough to neutralize that much surface area.
And, Do NOT USE SOLVENTS TO CLEAN YOUR STEEL Prior to Application of Any of my Patinas. Hope that Helps. 👍 If you have any further comments or questions, please let me know.
Thanks,
Bill 😎
p.s. Are you rinsing your steel with clean water before applying the COPPER F/X™?
And, have you watched my videos on application of COPPER F/X™?
bw
D
*DYES (HOW TO APPLY)
Q:Bill, Everything has been great. I received my order within 2 days with no issues. I could use some advice on using and applying the dyes. Thank you. Ron
A:Hi Ron,
There’s a myriad of ways to use the dyes, but most people use an airbrush to apply color/s on bright metal, or over COPPER F/X™.
The dyes can add colors to your work that patinas can’t, e.g. purples, oranges, reds, etc.
You can also use a small bristle-brush, a small piece of sponge, clean rag, even your fingertip.
Here’s a couple of Youtube links to videos I did quite a while back:
Q: Bill, I am new to metal working and really love your products. I have gotten the hang of most of the spray patinas and combinations. I have ordered an air brush and am about to attempt to use your dyes. Do I cut the dyes with any thinner? Or just straight into the cup? I have looked through the forum and your FAQ’s and videos but never see you add anything other than the dye. Thanks for your help. David T. 11/24/18
A:
Hi David,
Most dye users (including me), use the dyes as they come…pre-mixed.
We do actually blend our dyes at >20% above industry standards for ‘metal solvent dyes’, so you CAN dilute them with Acetone ONLY, up to 15-20%, or so. You shouldn’t see too much difference, but it depends on a lot of factors.
The best way to have plenty of dyes for your airbrushing is to buy the pre-measured Dye Powders, which come with the appropriate size lab-bottle.
The lab bottles are leak-proof and evaporation-proof, so all you do when you get the bottle with the powder in the bottle, is add Acetone, and shake gently, rocking back & forth & swirling, for about 3-4 minutes.
Then, (especially when using an airbrush), it’s best to run that liquid mix through a disposable, paper paint strainer, which are generally 200-300 mesh, into a temporary container, then back into your lab bottle. Dyestuffs & Pigments are never 100% pure and there can, and usually will be, non-dye-related sediment, even small metal particles. Not a lot, but enough to ‘log-jam’ your fluid tip on your airbrush.
It’s just best to strain the mixed dyes, so you don’t have to worry about it.
There is an indefinite shelf-life on the dyes, but the bottles should be replaced or rotated with new ones every 5-7 years. HDPE & Polypropylene can become brittle, just from the container wall porosity up-taking (absorbing) O2 from our atmosphere. Even if not placed in the sunlight, which will speed up the decomposition of HDPE, the bottles, and any HDPE bottle or jug will degrade over time.
The last one I had crack and leak was 11 yrs. old, and had yellow dye in it.
Thanks,
Bill
*DISTRESSED TOP-COAT (PAINT)
Q: Bill, I ordered your patinas to apply to galvanized steel. After I apply the patinas I would like to paint a silhouette over the piece. My question is, How can i distress this enamel? I am looking for a old worn look? Any ideas would be greatly appreciated. Thanks -Ryan
A: Hey Ryan,
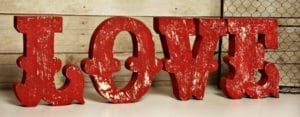
One of the most popular methods for creating a “distressed” look with paint is to use at least 2 or more colors.
Depending on the “look” you’re wanting, you can start with the lighter color, dry, add 2nd and/or 3rd colors, each darker than the previous one.
When dry, use Subtractive or Reverse sanding to wear away the top layer/s, especially around the edges of the silhouette and/or lettering.
A similar “look”, although a different method is shown above. The artist used a white base & red top-coat. Then, he applied masking to tape to the “almost cured” topcoat & “ripped” some of the color off. Hope that helps. Thanks, Bill
Q: Bill, Will the Patinas Mix With Spray Paint? That might sound pretty stupid, but what I mean is can you spray over the patinas? Could I spray paint and then scuff back to metal and then rust it? I need to add some slightly rusty looking areas to make the sign look aged, antiqued & old. Thanks for your help. Kevin
A:
Your question is a very good one! Yes, you can apply any paints or coatings over the patinas and/or dyes/stains. Then, You can do what is called ‘Subtractive Coloring’ or ‘Reductive Patination’, which just means you can scratch or sand through one or more of the top layers to create the look you desire.
“Reverse Patination”, or “Subtractive Coloring”, is an Easy Process Wherein the Artisan Purposely Adds Too Much Dark Patina or Paint Over a Lighter Patina or Bare Steel, Then “Age” or “Antique” it by Reversing the Degree of Color. I usually use a 3M Scotchbrite pad or a very fine (320-Grit) 2″ or 3″ Sanding Disk on an angled (45°) Die Grinder. It’s Pneumatic, so I Can Spin the Disc as Slow or Fast as I Need to For the Desired Look.
I’m a Big Fan of Subtractive Coloration or Reverse Patination. It Adds a Lot of Character to the Piece That Would Otherwise be Impossible.
Q: Hey Bill, I ordered the COPPER F/X™ CONCENTRATE yesterday and I can’t wait for it to come in! I’m applying it to a deer scene. The deer scene will be set down into a wood table and then epoxy resin will be poured over it. Do I need to clear coat it after I put the patina on? Patrick F., 1/7/19
A:Hi Patrick,
If you’re going to top-coat with Epoxy Resin, there is No Need to Clear-Coat First, Unless!…The copper-plated steel is going to be stored for a day or two and the RH (relative humidity), is greater than 40%, then a ‘dusting-coat’ of clear would be advisable to prevent flash-rust from forming. Or, if storing for a while before epoxy-coating, you can use VCI Paper.
NOTE!! WHEN USING ‘BAR-TOP’ OR ANY 1:1 URETHANE EPOXY, THE AMBIENT AIR TEMP MUST BE 75°F or ABOVE!
Just know this, too: Your piece needs to be 100% flat so the epoxy doesn’t migrate to the low end or low spots, if any.
And, when the epoxy is fully-cured (24-48 hrs.), you’ll need to flip it over and grind off the epoxy “icicles”…which is really easy, btw. I use the AVOS 36-Grit Discs OR the 80-Grit Flap Discs for this, and it’s very quick and easy.
When removing the ‘drips’ and ‘cured epoxy icicles’, wear a Disposable N-95 Dust Mask, as the Epoxy Resin dust and smell is slightly toxic , or at least an irritant to your nasal mucosa.
TIP: Brush on the epoxy (light coat) first, then pour. I use a disposable 2″ Foam Brush. The capillary action of the wet surface will help the epoxy spread evenly, and if you’re ‘surgically careful’ there will be hardly any run-off.
The edges will ‘stop’ the self-leveling epoxy by cohesive action. That takes a little practice and skill, however.
Then, don’t use a propane torch to remove bubbles. Use a butane torch, and you’ll have to baby-sit the bubble removal for at least an hour or more, as very tiny bubbles will keep appearing. (I babysit my epoxy pours for at least 2 Hours, every 20 Minutes, or so). If bubbles are left, they will appear as a hazy, dull area on the finished gloss epoxy coating, which is not what you want.
It can be used in any position, whereas a propane torch will ‘self-extinguish’ if held in a horizontal or downward position. Mapp Gas is a little better, but butane is ideal, as it will not self-extinguish in any position.
btw…it’s not the heat from the flame that quickly makes the bubbles disappear…it’s the carbon dioxide from the flame that ‘sucks up’ the oxygen (bubbles) and makes them dissipate and disappear at the surface.
If you have any other questions, let me know. Below is a photo and link to the torch I use. They’re refillable, so get a few butane refill cans, too.
FLAME/TORCH/HEAT COLORING STAINLESS VS. STAINLESS F/X™
Q:
I work exclusively in Stainless Steel and although I’m aware of your STAINLESS F/X, I wondered if you had something with a little less “random color” and more control over colors, like a dye, or something.. I don’t actually want complete control, just something to keep an area in a blue color range, and a red color range, etc.
I’m not set-up to do heat, and even if I wanted to go that route, I don’t really know how hot, etc.
Thanks, Michael S., 2/9/19
A:
Hi Michael,
Heat-Coloring a.k.a. Flame Coloring or Torch Coloring of Stainless or Carbon Steel is more of an Art than a Science.
It takes a LOT of practice to get it right, and some distortion on thin metal is inevitable.
I do have a line of Metal Dyes that may work well for you. They are best applied with an Gravity-fed Airbrush or Small Detail Gun, like an Iwata LPH-80.
Brushing or wiping is almost ‘out of the question’, as it will leave streaking.
A high-quality top-coat is highly recommended, too. A Bar-Top Epoxy or an Automotive Catalyzed Clear (4:1) is most common.
If your total sq. ftg. is relatively small, I have a catalyzed clear in aerosol form on my site called, SprayMax 2K (2K is industry jargon for “two components”).
I’ve never actually tried to get a solid color with STAINLESS F/X, but it may be possible by wiping as opposed to ‘spritzing’. The outcome would likely be a gradient blue, though…no reds.
Hope that’s helpful.
Thanks, Bill 👍
G
GENERAL ADVICE ON GETTING STARTED with PATINAS
Q:
Hi Bill,
I found your products being a plasma spider member. I own a fabrication weld shop in Alabama and we started doing CNC art back in January and have had good luck with our designs but it is time to up our game. We have been painting or rusting our cutouts with vinegar and peroxide/salt mix. It works ok but after seeing your stuff it makes them seem inadequate haha. I was wondering if you could give me some pointers on which products to try and about how many items they would cover. I know that may be hard to gauge because of size, design and which ones we use and all. I know I would like the COPPER F/X and RUST F/X.. and probably the BLUE HALO or TORCH F/X. I look forward to your feedback and getting my products ordered. Also how well are the dyes vs just the patinas for color? I hate to keep on with the questions but also the clear coat, how is your clear vs a rattle can clear? I am sure yours is much better but hard to justify the expense being a small shop. Again thank you for your feedback. Thanks, Bradley R.
A:
Hey Bradley,
I’d be Glad to Throw Some Advice Your Way. First of all, you’re on the right track when you say, “up our game”. According to the latest statistics, less than 2% of ALL Plasma-Cutting Artisans are using any finishing products other than PC, Paint or even Bare Steel. And, it’s also a fact that patinated and/or dyed metal art will fetch an average of 2-3X as much money as the run-of-the-mill offerings mentioned above. I refer to Powder-Coated metal art as, “Future Yard Sale Items”.
There’s a Common Myth That Steel Patinas Are ACIDS & Therefore Very Dangerous & Expensive to Use.
Wrong on Both Counts. The acid content of my water-based, chemically reactive patinas is, in almost all cases, way less than 1%. I’m referring to mine…I don’t know about the other products out there on the market.
They are odorless, fume-less & very, very safe to use, be it indoors or outdoors. The cost, including time, of patinated, clear-coated steel art, is actually the same or less than Powder-Coating! And, the process, besides being fun, takes no more time than properly preparing steel for PC, whether you do your own PC or take your pieces to a Powder-Coating Service.
I’m impressed that you mentioned 4 particular patinas in your email. The 4 you noted are in the Top Five of the most popular patinas that I manufacture. FLAME F/X™ Liquid Patina would round out the Top Five.
You can ‘build your own kit’, if you want to start out with your choice of patinas AND sizes, and experiment with those. The Kit I’m referring to is called the
“PRO STARTER KIT” , and each individual, optional choice on this kit is discounted between 10% and 15%!
STEEL PATINAS “PRO STARTER KIT” ~ Each Ultra-Premium Steel Patina Product is Discounted 10%-15%! You Build Your Own Kit, Including Size & Quantities. Includes Trigger-Spray Bottles on the 16 Oz. & 32 Oz. Sizes. I Have Hand-Picked This Incredible Selection of Premium Patinas That Include the Most Popular, High-End Patinas That Are Not Included in Any of the Other Starter Kits! And, Check out “BILL’S FAVORITES” for: “Must-Haves” & Additional Recommendations.
One Recommendation I Would Like to Make is, Start Out With at Least 1-Gallon of COPPER F/X™, as it is Often Used Alone, or as a Base For Other, Darker, Complementary or Contrasting Color/s and Effects. COPPER F/X™ is NOT Required as a Base for Any of the Other Patinas, With the Exception of TORCH F/X™, Which Will Have Little to No Reaction at All on Bare Steel.
There are Also Other Patina Starter Kits, and the ‘Super Starter Kit’and ‘Super Starter Kit Combo’, Which Comes With a Full Set of the 4 Oz. Dyes, are Extremely Popular With New Customers.Both Kits Have an Extra Gallon of COPPER F/X™.
As to your question re: Dyes…There are some colors that can not be produced on steel with patinas, such as Brilliant Reds, Purples, Yellows, Greens, so a lot of artisans will embellish their patinated steel with dyes after the patinas have been applied. If you’ll take a look at the photos underneath any of the Dye Sizes or Dye Kits, you’ll see what I mean. And some artisans use Dyes Only. You can think of the dyes as translucent colors on polished steel, so you’re not hiding the beauty of the steel. The only dye that’s not truly translucent is the White Dye, as it contains pigments, namely Titanium Dioxide. White Dye is typically used to Tint (Lighten) another dye color. For example, if you wanted a pink color, you would add a few drops of White Dye to the Red Dye, which would change the Red to Pink. Any of the Dyes can also be Shaded (Darkened), by adding a few drops of JET BLACK DYE. All the Colors in the World Originate from the 3 Primary Colors, Which Are RED, YELLOW & BLUE. And, of course White & Black come into play, although Black is not a Color. And, there are well over 1,000 Different Shades of White.
I also have Alcohol Inks, which give the exact same results as the dyes, but give a much longer ‘working time’, as the dyes dry instantly. The Alcohol Inks Take up to 10 Minutes to Dry, Giving You a Lot of “Working Time”. Both products are best applied with an airbrush, but a bristle brush or piece of sponge will work, too. I
The Gel Patinas are something to consider in the future, but just know that they are most often used for a marbling or ‘random patterning’, which is not achievable with the Liquid, Spray-On Patinas.
Watching a lot of videos can be about the same as watching grass grow, but if you’ll check out a few of my videos, either on the site at: https://steelfxpatinas.com/how-to-videos/ or my YouTube Channel. You’ll see just some of the many things you can easily accomplish with my product line.
I wrote a short eBook called, The Missing Manual, (FREE DOWNLOAD) @ ‘Steel Patinas & Finishes’ back in 2011 that really needs to be updated…as soon as I get time.
Regarding Clear-Coats:
I’m not particularly fond of single-stage clears in Aerosol, (Allow me to Rephrase That…I Despise Rattle-Can Clears or Lacquer!), or any other form of Single-Stage (No Catalyst), as They’re Mostly Solvent With a Very Low Percentage of Solids. Some claim to have UV Inhibitors, but from my experience, I sorta doubt it. KRYLON, DUPLI-COLOR & RUST-OLEUM are all good brands. I believe it’s KRYLON® that has a new, heavier bodied (more solids/less solvent) 1-stage clear-coat, which is rated for indoor/outdoor & I think it’s called, “PAINTER’S CHOICE 2X”. I haven’t tried it extensively, but the sample piece I used it on looked okay. Not nearly as smooth, glossy & deep as SprayMax 2K or DELTRON. I can’t speak to how long it will last outdoors in extreme exposure to the elements.
I use an Automotive Clear-Coat called PPG DELTRON DC3000. Over the Years, I’ve Tried Probably Every Automotive 2-Part (2k) Clear on the Market & I Won’t Use Anything but DELTRON. I’ve got no ‘skin in the game’ with PPG, so I’m Not Getting Any Compensation From Them…They Don’t Even Know Me. It’s Just the Best There is Out There. No One Has Even Come Close to the Quality of PPG® DELTRON. If you make your living or add to your income with Metal Art, you owe it to yourself & your customers to create great finishes & top them off with the best Clear-Coat you can.
It’s on my site, if you choose to try it sometime. Consider taking one of your patinated pieces to a buddy or a buddy that has a buddy that works in the collision industry (Auto-Body Shop) and have him shoot 2 wet coats of his favorite clear-coat, also called a top-coat & compare the results to a ‘rattle-can’, off the shelf clear. The comparison will blow your mind. Warning: The body shop guy will say, “you can’t shoot clear on bare steel”. (it’s the way they’ve been trained…). Trust me, you can! I’ve got signs all over the U.S. that are 10+ years old & I’ve NEVER received even one single customer complaint about the clear-coat oxidizing, fading, peeling, lifting or any other calamity that can befall a cheap clear-coat. DELTRON® is a higher grade clear-coat than that used in the car factories.
I also have a 2-Part Clear that comes pretty close to rivaling the beauty of DELTRON, and it comes in an Aerosol Spray Can. It also comes in Gloss & Semi-Gloss. It’s called,‘SprayMax 2k’. There is a catalyst chamber inside the can, and you mix it by removing the red plug from the main cap, placing it on the bottom of the can and striking the can downward on a sturdy workbench, anvil or concrete floor. Once you shake it up, you now have a 2-Part Clear, but 1 can is only good for about 25 Sq. Ft. & will only remain viable in the can for 72 hrs. That’s referred to as, “pot-life”. DELTRON DC 3000, once mixed has a pot-life of 1-1/2 hrs. Plenty of time to refill your gun’s cup 2 or 3 times. I’ve used SprayMax 2kas far out as 4 days, but on day 5, it would not spray at all.
Both Clear-Coats utilize a catalyst (hardener), in a 4:1 mix with the clear for an ultra-clear, deep, high-gloss finish w/ excellent UV inhibiting properties. It leaves your work with a “dipped in glass” appearance.
You can use any clear-coat that you’re comfortable with. Just know that some are way better than others. Cheap clear-coats won’t give much longevity, especially on outdoor items. You can even use Clear Powder-Coat if you make sure it contains a UV Inhibitor & the person doing it knows what he’s doing. If you can, get a written warranty against fading, oxidizing, yellowing or the color/s underneath being denigrated over time due to lack of UV Inhibitors.
Clear Powder-Coating over the Patinas and Dyes is Somewhat Dicey, But Fine if Done Properly. Some of the lighter colored patinas, like COPPER F/X™ will sometimes change to a slightly darker hue, usually a greenish-gold, but in general, no problem with powder-coating if the time & heat in the oven is kept to a minimum.
I don’t use powder-coat clear on any of my work for that very reason. Automotive Clear-Coat is Far Superior, Both in Quality & Appearance. It doesn’t cost any more per Square Foot (last time I checked) & The Results Are Fabulous!
It is advisable to tack-rag the piece just prior to shooting on the clear-coat, whether it is powder-coat or automotive clear, to remove any flash-rust, even if it’s not visible to the naked eye. I have ‘Surgical Blue’ Tack Rags’on my site. They’re very inexpensive.
And, it goes without saying that all welding needs to be done before the clear-coat.
I could keep going & going, but let’s call it ‘good for now’, and if you have any other questions, just let me know.
Thanks, Bill
GELS FREEZING OR BECOMING TOO THICK
Q:
Hello Bill:
I have a couple of your gel patinas that are so stiff (jello like) that they are hard to use. The other four are “gel” like and pour nicely. Is there anything I can mix them with to help with pourability or do you have any other suggestions?
Kenn P.
A:
Hi Kenn,
The Gel Patinas can become very thick or gelatinous, but only in the winter months. Some of gels are more susceptible to ‘stiffening’ than others and it’s due to low ambient temperatures, especially <32°F. I’ve experimented for years with at least 10 different additives that prevent the gelification of Polymer Gels, but they all have negative effects on the Gel’s performance. We’ve also looked into ‘freeze-proof’ packaging, but it is seriously more expensive than the gels themselves.
You can reconstitute the gel’s viscosity by placing in the microwave for 10s at a time, with the cap on but not screwed down. You can also use a ‘Double-Boiler’, or transfer gel to a glass container and place over an alcohol flame. PLEASE READ THIS BLOG POST.
Any of the methods mentioned above work like a charm and there’s no off-gassing of anything dangerous, although a cheap microwave used only for that purpose and not used for foodstuffs would be advisable*.
*(My lawyers make me say that)...
Thanks,
Bill
GEL PATINAS (Sealing, Metal Prep…)
Q: I just recently bought the FLAME F/X, BLUE-BLACK F/X and BLUE HALO GELS. I love the colors that I get. Just a few questions, though: What polish do you recommend for the metal before applying the gels? How do I keep the colors from fading and changing after a couple of days?
A:
Hi Chris,
When you get the combination of colors you want, and in order to prevent any oxidation, either clear-coat your surface/s or apply some Renaissance Wax. One tin will probably last you a year or two. Just a little bit goes a long way.
It will seal the metal from oxygen and moisture as well as brighten the colors you achieved with the gel patinas.
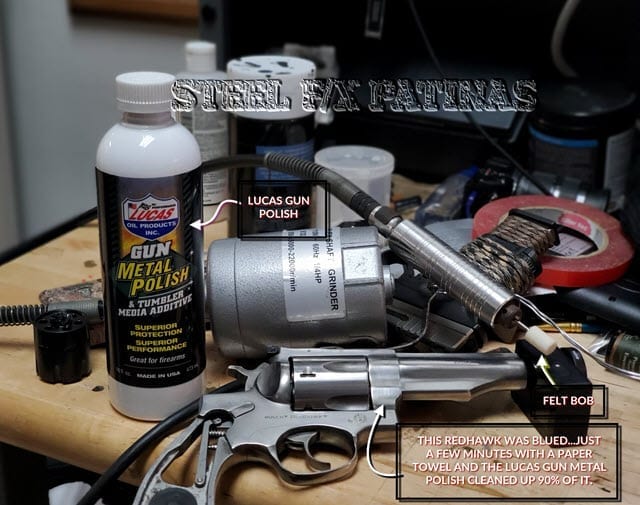
As far as metal polish, there’s a few hundred ways to approach the prep. The whole idea is to get the base metal as shiny as possible. I have a 3/4 h.p. buffer for getting most areas ready, but will also use a foredom tool for the tighter areas. I use a non-woven felt “bob” on my Foredom Tool, and a very small amount of Lucas® GUN METAL POLISH. (It’s the same product I use in my tumbler and vibratory polisher for cleaning up used brass (bullet cases), and finished cartridges).
To get your substrate completely oil free, use GRIME GIT’R™ or Denatured Alcohol.
Some ‘soft-scrub’ liquid cleansers will get rid of any oily residue, but they will oftentimes dull the shine you’ve worked so hard to get.
Let me know if you have any other questions.
Bill
800-710-1273
GOLD RUST F/X™
Q: Good evening Bill. I am doing an interior steel sign and the client wants to get close in color and texture to the sample image I have attached.
Any ideas and tips would be great. I have used your products 3-4 times and love them! The sign is 30” x 84”.
Thank You, Ben B., President
A: Ben, There’s a couple of ways:
1) If…(if I had 1 helper, since the sign is so large), I would quickly cover the prepped surface with COPPER F/X™, rinse quickly, blow off excess water, leave damp and begin the darkening/mottling with GOLD RUST F/X.
2) Using GOLD RUST F/X™ ONLY, (since quick rinsing is not as critical as with COPPER F/X™), establish the lighter toned background, rinse and continue, in spots/areas with more GOLD RUST F/X™.
GUNSMITH’S SPECIAL™
GUNSMITH’S SPECIAL
Q: Hi Bill,
Great products, and great videos! I have a question.
I want to try color case hardening effects on my stainless Ruger Blackhawk frame (stripped).
Any recommendations? (And I’m referring now to the use of your products)
Thanks in advance,
Garrett Powell
A:
Hi Garrett,
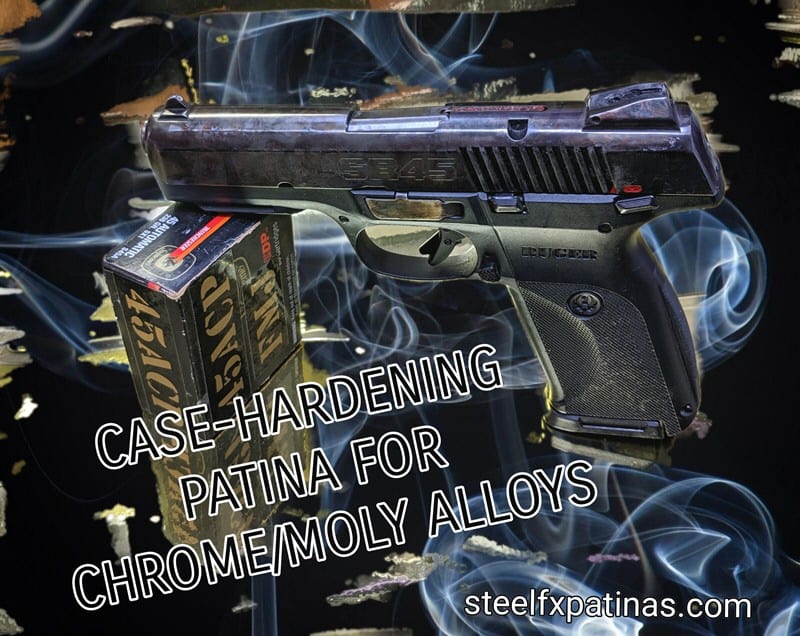
You mentioned ‘Redhawk’ AND ‘Blackhawk’, but regardless of which one you have, Ruger’s alloys are usually a very hard, fine-grained Chrome/Vanadium or Chrome/Moly and very resistant to the necessary chemical reaction needed to achieve a case-hardened look.
I have a relatively new product called, “GUNSMITH’S SPECIAL™“, that should work well on either one.
If your firearm is blued, all of that bluing must be removed first and the Surface Activator must be applied to a 100% oil-free surface, so don’t use any rouge or petroleum based cleaners or polishing products.
Use dry abrasives only. I would highly recommend that you use GRIME GIT’R™ to thoroughly ‘wipe-down’ the surfaces before applying the activator.
The 2nd Component, (a purple liquid), is where the magic happens, but it must be applied while the Surface Activator is still wet and visible on the surface/s you’re working with.
(It’s all easier than it sounds, btw)!!
A new video tutorial using GUNSMITH’S SPECIAL™ is in the works, but I’m not sure when it will be “live” on youtube. The pistol to be used in the video is a RUGER® Redhawk, 45LC, Stainless/Chrome/Molybdenum.
Thanks,
Bill 12/22/19
H
HAND RUBBED BRONZE.
Q: Is it possible to apply a “Hand Rubbed Bronze” finish to type 304 stainless steel sheet? If so do you sell the products or can you supply instructions for doing this. We are fabricating a large fire place hood and the customer wants it to look old.
A: There’s a couple of ways, one of which is very difficult, dangerous & unpredictable, so I’m gonna skip that one.
The second way is dyed wax, commonly known as Dark Brown Shoe Polish. The wax type though, not the liquid. Try it on a small scrap piece first to see if it’s what the customer wants. Thanks, Bill
I
J
K
L
M
N
O
Oil-Rubbed Bronze Patina on Steel
Q: Hi Bill,
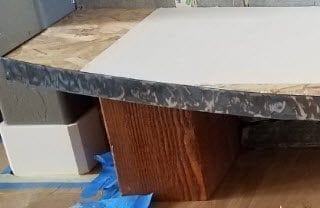
The product I purchased is not working well for my project. (This is likely due to my ignorance, not necessarily a problem with the product.) Here’s what I’m trying to do … Do you have any suggestions?
I have a 2″ wide piece of steel “trim” under the hearth for my (new construction) fireplace. My fabricator touched it with a grinding wheel so that it has a mottled appearance of dark oxide areas and bright silver polished areas. I was hoping to apply the Burnt Copper F/X Gel to tint the silver areas more of a copper/gold/bronze color. When I apply the gel to a sample piece following the procedure shown in your video (but using a damp rag to wipe off the gel since I won’t be able to dunk or spray the hearth), I get a small amount of color but almost all of it wipes off with the gel no matter how long I let the gel sit.
I’m guessing my issue has to do with the steel not being highly polished. Any ideas/advice/input would be appreciated!
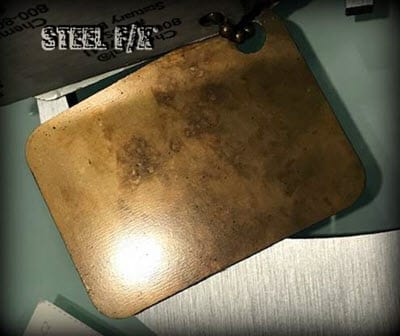
This is my steel trim piece:
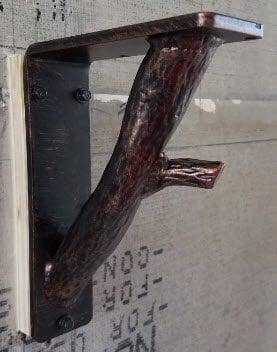
And, this is the Steel Corbel I’m trying to match with your patinas.
BRONZE F/X™ GEL Patina is much darker than BURNT COPPER F/X™ GEL, and it will leave an “oil-rubbed bronze” finish on the steel.
If any patina is being ‘wiped off’ or coming off in any manner during a damp/wet rag rinse/neutralization, it simply means one thing and one thing only: There is some minute degree of oil present on the substrate. Did you use some sort of solvent before the patina? (Solvents will leave enough water-repelling residue that cause the patinas to not ‘etch’ or ‘bite’ to the steel.
If you do need to remove oil, contaminants, etc., and leave a pristeen substrate, ready for patina, use a powdered cleanser or denatured alcohol. (Vodka works, too).
No other solvent will work, as they ALL leave an oily residue, however minute.
Thanks for the Question,
Bill
p.s.
Also, as you probably already know, the patinas will have no effect on the areas where the mill-scale was left in place.
btw, the “look” of Partial Scale Removal”, combined with a patina applied only to the shiny areas of raw steel, is one of my favorite combinations. It’s a very cool look!
Hi Bill, It would be helpful if you would post photos of each of your patinas as applied to bare steel so that the consumer could see what the finished color looks like. I am welding together a large dinosaur (6′ high by 10′ long) and would like to have various red, yellow and dark effects. Which patinas do I use to achieve those colors? Must I do the entire piece in copper first? Thanks! Terry S.
A:
Terry,
Any user, including myself, could make a single STEEL F/X® Patina look 20 different ways on a piece of steel, depending on how long it was left on, how the steel was prepped, how it works in conjunction with another patina or multiple patina products.
Patinas Aren’t Paint, so Application Technique/s, Individual Artistic License, and Other Factors Are Involved. The Product Label is Indicative of What the Patina Normally Produces. And Each Product Has Descriptive Photos Below the Main Image, Submitted by Customers, That Show Variations of What Can be Accomplished.
If I limited the patinas to only ONE example of “how it looks” on steel, I would be diminishing the actual potential of what that particular patina COULD look like, and it’s variations.
The Only Patina That I Have to Produce Yellows and Reds is Called, “BLAZE F/X™”.
You Can Also Use the Yellow, Orange & Red Metal Dyes to Achieve Those Colors, and if You Will Notice on the Site Photos, Mostly Customer-Contributed Photos, You Will See That COPPER F/X™ is Not Required, But is Often Used as a Base Patina, Followed by Other Patinas and/or Dyes.
REVERSE PATINATION (SUBTRACTIVE or REDUCTIVE PATINATION)
Q: Can I paint over the patinas and then scuff back to metal and then rust it? I need to create some pieces that look like the steel was painted, then worn, aged & rusted in places. Thanks for your help. Kevin J. 4/17
A: Hey Kevin,
Your question is a very good one! Yes, you can apply any paints or coatings over the patinas and/or dyes/stains. Then, you can do what is called, “Reductive Coloration” or “Subtractive Coloration”, which just means you can scratch or sand through one or more top layers to create the look you desire.
I also call it, “Reverse Patination”, wherein I purposely add too much dark patina over a lighter patina or bare steel, then “age” or “antique” it by reversing the depth of color. I usually use a scotchbrite pad or a very fine (320 grit) 3″ Sanding Disk on an angled (45-degree) Die Grinder. It’s pneumatic, so I can spin the disc as slow or fast as I need to for the desired look.
I’m a Big Fan of Subtractive Coloration or Reverse Patination. It Adds Character to the Piece That Would Otherwise be Impossible.
Bill, I’m Intrigued. I Have Two Questions For You.
1) I’m guessing the product does not protect steel from rusting. True or False?
2) If the product is used for design on a firearm, what would you use to seal it, for long-term protection?
Bill Worden 1 second ago
@Brian Cobb ~ 1) The product does not prevent ferrous metals from rusting or oxidizing, but on MOST Stainless Steel alloys, that’s a moot issue, where the choice to seal or not to seal is optional. 2) Depending on the intended use of the finished product, there are several approved methods of top-coating: 1: A Ceramic Clear (like Cerakote®, 2: A Catalyzed (2-part) Automotive Clear, or 3: (which is my personal favorite for most items, “Renaissance Wax”. It’s a micro-crystalline wax that seals the substrate and protects from UV light, smudges, fingerprints and the incidental ‘light abrasion’ or scuffing. 3 coats recommended. It’s very easy to apply & buff off by hand and is very affordable. Plus! A little goes a long way. Amazon or my site, at: https://steelfxpatinas.com/shop/renaissance-wax/ If you have any other questions, please let me know. Thanks! Bill
Q: I have been playing around with your different patinas and I get a very nice effect with the copper but have had no effect with an other patinas. I start with a piece of 16 ga, soaked it in a acid bath and then hit it with the flapper disk to clean it up nice. I sprayed it down with water and shook it off. I sprayed on the copper and the effect was instant. After bout 15-20 secs (3-5 seconds is plenty…15-20 is too long) I washed that off and blew it off with air. Now is were I am probably not following along. I purchased your book but I still maybe doing it wrong. After I got the copper effect I wet the piece again and sprayed on the torch fx but I saw no change. So I said heck with it washed it off, dryed it and clear coated it. It was already nice looking. I did the same thing a second time and this time I sprayed on the copper base and just rinsed it off and before I blew it off I tried the torch fx. Still nothing. I thought maybe I wasn’t putting enough so I just sprayed the whole piece to see what that would do and still nothing. So I tried it a third time and this time I tried adding the torch fx right after spraying on the copper and before rinsing it. Still haven’t been able to get any real effect from the torch fx. I also tried the same process with the pewter and got a slight reaction. So I figure time to step back and ask the expert. Any words of wisdom?
A: Softly spray the TORCH F/X™ in one area at a time, slowly adding more spray til red develops, then adding more till a brilliant blue develops, then neutralize with water. TORCH F/X™ only works on top of the COPPER F/X™, it will not work on bare steel. The COPPER F/X™produces instant results. The PEWTER F/X™ & TORCH F/X™ take a little patience and continued spraying. Do one section at a time. Do not rinse or neutralize until you get the coloration you want, then rinse, force-dry, tack-rag & clear coat. PEWTER F/X™ will be similar in application to the TORCH F/X™…continue to mist one area at a time until the COPPER F/X™ base slowly turns darker hues of gold, brown & bronze. The PEWTER F/X™ has small particles of Silver Nitrate, you MUST shake well before & during use for best results. If your sprayer head clogs with those particles, you might try a squeeze bottle with a larger opening. Try spraying in one localized (4”X4”) area, repeatedly until the darkening and patination occur.


 Any ideas and tips would be great. I have used your products 3-4 times and love them! The sign is 30” x 84”.